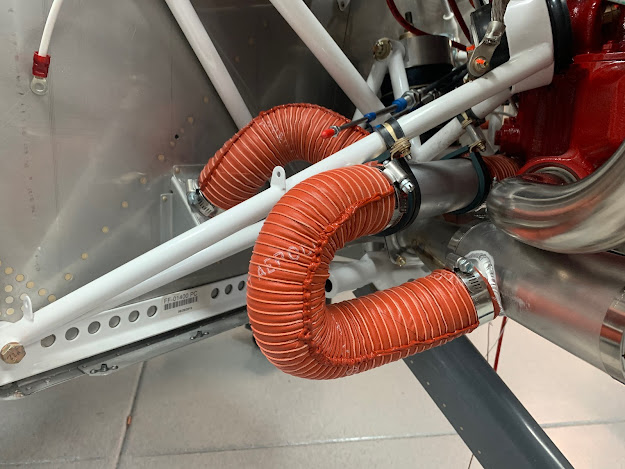
Once the cowling was done, I continued wiring up the panel and the FWF components to the relays, shunt and battery. I was careful to think through the wiring runs to minimize excess and create clean pathways that would be somewhat easy to fix if there's a problem down the road. I also went with OLC-2 connectors in a lot of places covered by heat shrink to allow for easy fixes if required. I guess the alternative is butt splices, but wire needs to be removed if they need to be cut out which means feeding more wire through the firewall if necessary. I did create a service loop of EGT/CHT wires as well as the electrical system wires that pass through the firewall. The loop creates some excess/spare wiring and is looped underneath the forward skin aft of the firewall for contingencies later on.
My FAA friend gave me some more pointers in the FWF area to make sure everything is secured appropriately as the DAR will be focused on that for sure. I had to order some larger ADEL clamps as I figured out where I would be routing magneto wires etc. The E-mag leads are larger and less flexible than the slick mag ignition leads, so larger clamps were necessary where attached to the rockers. Just more orders from Spruce!
Otherwise, FWF wiring is complete and the panel operates normally. I'm moving on to G3X configuration (flap calibration etc.) while I wait for my hangar to open up. I'm #6 on the list and hopefully able to get there soon. I'm ready to put on the wings and finish wiring!
There was a small gap on the right side of the snorkel where it attaches to the fuel servo. Per plans, I sanded down the left side of the snorkel until I had an even fit.
Cowl baffle seals attached with pop rivets
Exhaust attachment
Exhaust system vertical and horizontal attachment. The horizontal option isn't in Van's plans, but is included in a piece of paper included with other exhaust system components. I asked around a bit and it sounds like some do this and some don't. it was a fairly quick job, so I want to make sure everything is secure and not going to be subjected to vibration fatigue.
EGT/CHT wiring as well as the ADEL clamps used to secure them to the rockers.
This is how I wired my ammeter shunt. I could have used the smaller #8 sensor attachment points for the ammeter wire that goes back to the G3X, but I didn't figure that out until later. I did include the 24AWG wire to act as the 1AMP fuses to protect the G3X IAW the Garmin manual. Inline 1AMP fuses are also acceptable, but I didn't like the bulkiness of that option. I ended up using D-Sub male and female pins to make these connections, covered in heat shrink, and easily replaceable.
Throttle and mixture controls hooked up and tightened down. This took some tweaking to make sure that the throws were correct in the cockpit and at the actuation points.
Added brake fluid to the system using the attachment hoses shown below. I dialed back the pressure on my air compressor to about 30 psi and then just barely squeezed the handle to add pressure until I saw the fluid in the plastic reservoir start to go down. I made sure there were no bubbles coming out of the overflow hose attached to the reservoir on the firewall. I went back and forth several times between left and right sides to ensure that all air was purged from the system. Getting closer!


