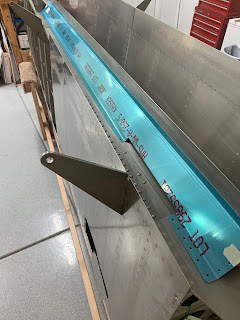
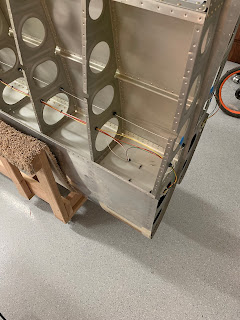
The QB wings are mostly complete upon arrival. Fuel tanks are complete, and have been leak tested (although the plans recommend leak testing again for peace of mind). That leaves running wiring, flight control pushrod installation and rigging, flap/aileron gap fairings and two bottom skins. There are probably a few things I missed there, but those are the major items.
Fairings in place with vinyl still on to show general positioning. The QB wings and fuselage are primed at the factory, so I decided to keep that trend going for the final finishing of the wings. I used rattle can SEM self-etching primer that worked pretty well. I applied that on both sides of the fairings and along the rivet lines for the bottom skins. All the flight control pushrods and associated parts are primed in accordance with the plans.
The wiring is pretty straight forward. Just have to install the snap bushings and run the wires per the plans. This is also where I started to get nervous about how the standard wiring harnesses will incorporate with the Stein Air or AFS panel options I'm looking into. I guess we shall see; there's an extra unfilled snap bushing in each wing to run additional wires. At this point I know for sure that I'll need to install a heated pitot system and that the factory included pitot placement and system will not be sufficient for my full-IFR intentions.
Riveting the bottom skins was one of the most challenging parts of the build so far. Not so much because it's difficult to understand, just difficult to access and reach. This is where my oldest son's assistance was crucial. He's very good with the rivet gun at this point and I had to use my long arms to get in to the tight spaces with the bucking bar. It took a lot of readjustments along the way and I used a lot of rags/padding to not shred my arms in the process. I have learned many times so far that aluminum with the slightest bur cuts very efficiently.
Very happy with the final results.
Once the skins are in place, it's time to install the push rods for aileron movement. I ensured I was spot on with the measurements for pushrod length etc. and I was pleased with the results once I had everything attached to the aileron and wing root. Flight controls move freely and are rigged within 1/16" of the alignment jigs provided in the kit.
I purchased the LED lighting kits available at Vans. The only problem I ran into was the connection from the standard wiring harness to the LED kits at the wing tip. In the end, as others have done, I cut off the factory supplied connector and then attached the one that came with the lighting kit.
Total time spent on the QB wings was about 85 hours.


No comments:
Post a Comment